Enhanced Conversions Tracking on Magento
What are enhanced conversions? And how to set up enhanced conversion tracking using our GTM extension step by step.
A few words about enhanced conversions
Enhanced conversion is a feature that can improve the accuracy of your conversion measurement and unlock more powerful bidding. It supplements your existing conversion tags by sending hashed first-party conversion data from your website to Google in a privacy-safe way. This feature allows you to retrieve advanced customer data such as email address, phone number, first name, last name, home address, city, region, country, and postal code. This data can be captured in your conversion tracking tags, hashed, sent to Google in its hashed form, and then used to enhance your conversion measurement.
Finally, this feature will allow you to run marketing campaigns more effectively and get more money.
Here’s the biggest benefit that you’ll get from using Google Ads enhanced conversions:
- There’s less ambiguity about which actions are driving results, giving you more concrete data. That’s an enormous advantage.
- Better data quality, that allows both you and Google to improve and optimize your campaigns.
- The ability to better track how specific Ads events are driving conversions.
Additional benefits:
- Give you a better understanding of your customer journeys
- Make your conversion data more accurate across your indpaigns so you know what’s really working
- Give you more data that you can use for retargeting campaigns
How to set up enhanced conversion on your Magento?
Step1: Install and Enable Magento Extension
- Get and install the extension on the Marketplace
- https://marketplace.magento.com/decimadigital-module-datalayer.html
- follow the standard installation procedure
- Got to the Back Office and configure it
- Stores -> Setting -> Configuration -> Decimal Digital -> Data Layer.
- Here you need to enable the extension and specify your container id (for ex. GTM-WHPJVL2).
- Then enable Enhanced Conversion Tracking.

Step 2: Enable Enhanced conversion on Google Ads
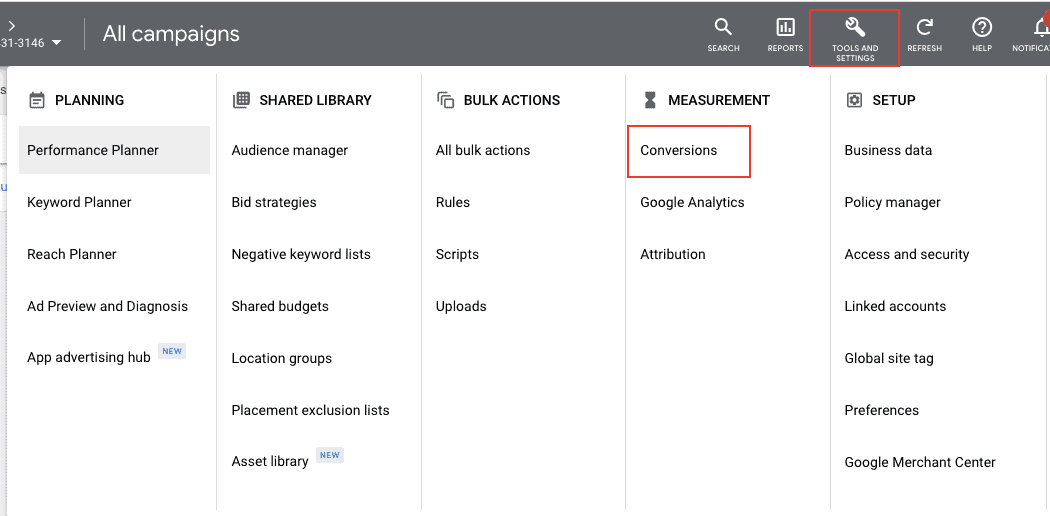
- Go to Google Ads, and then click “Tools and Settings”
- In the top corner, find “Conversions” under “Measurements” and click to manage conversion settings.
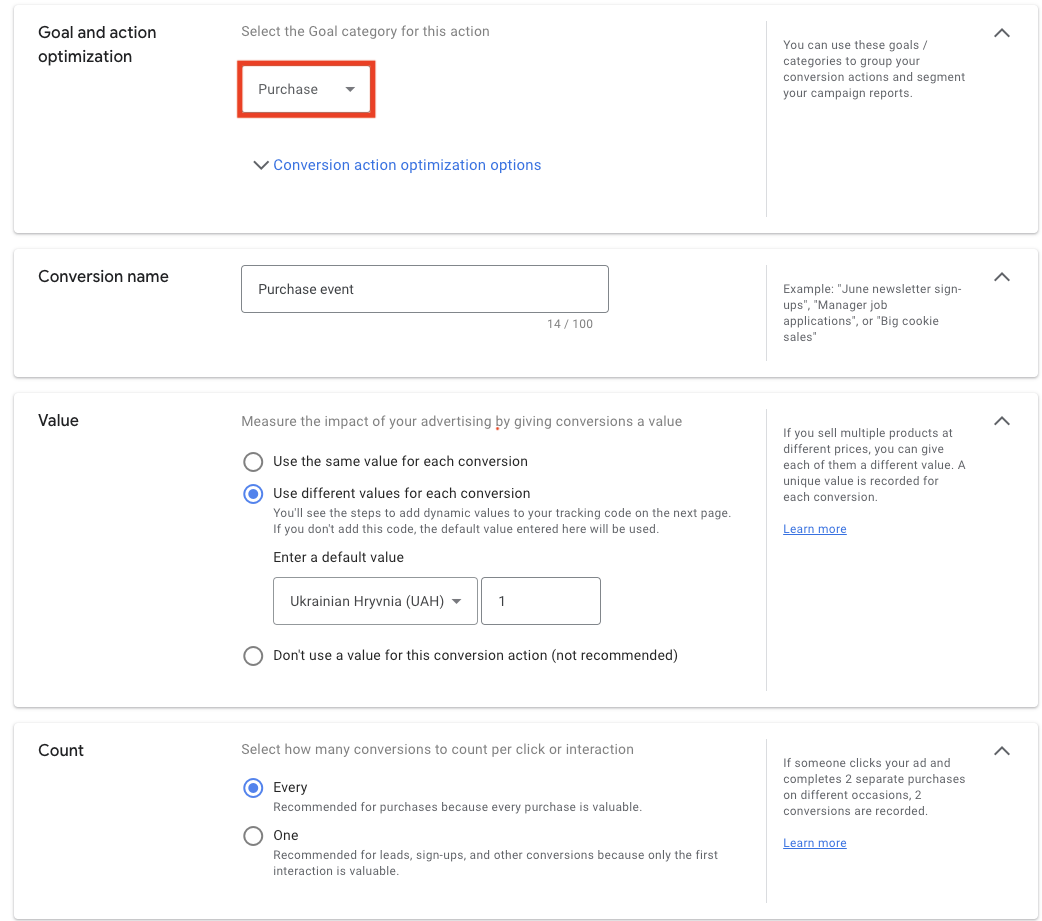
- The key conversion parameters to control:
- Conversion events to track, choose purchase event
- Select the kind of conversions you want to track -> Website
- Set your website domain <https://example.com> -> Scan
- In the section “Goal and action optimisation”the select “Purchase” option
- Finally, At the “Get Instructions and Finish” step
- Copy the Conversion ID and Conversion labels in the section “Use Google Tag Manager”.
- it will be required for further GTM configuration
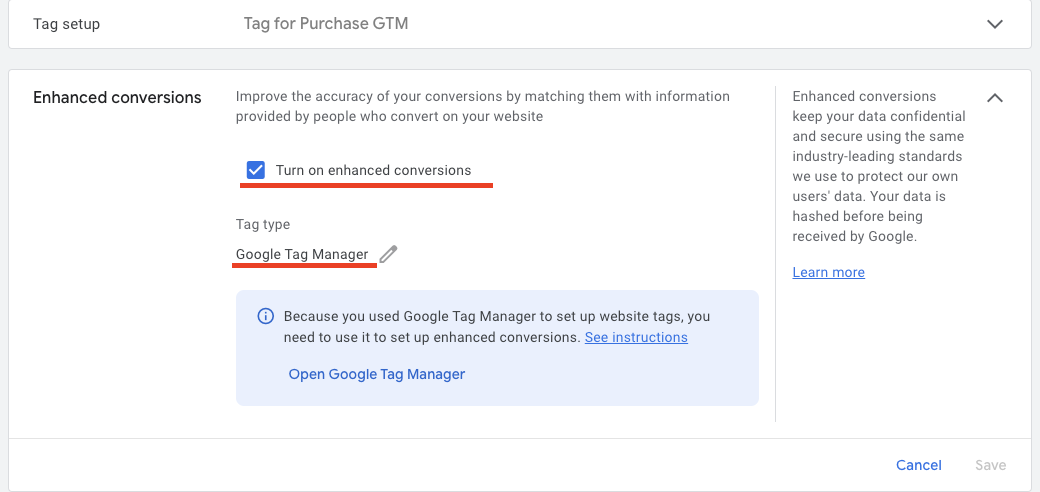
- Find the “Enhanced conversions” section
- Click “Turn on enhanced conversions” to enable enhanced conversion for GTM
- And choose Google Tag Manager as the main option
- Copy the Conversion ID and Conversion labels in the section “Use Google Tag Manager”.
and we are almost there )
Step 3: Configure GTM to enable Enhanced conversion
It is time to go to Google Tag Manager and create a Google Ads Conversion Tracking tag (if does not exist)
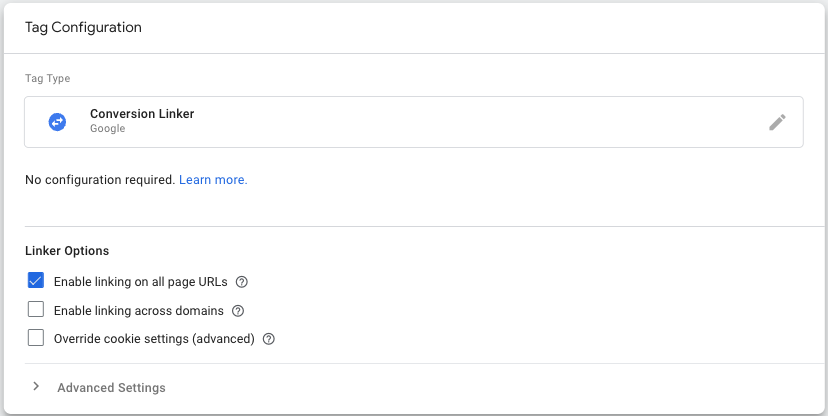
- Create a Conversion Linker tag
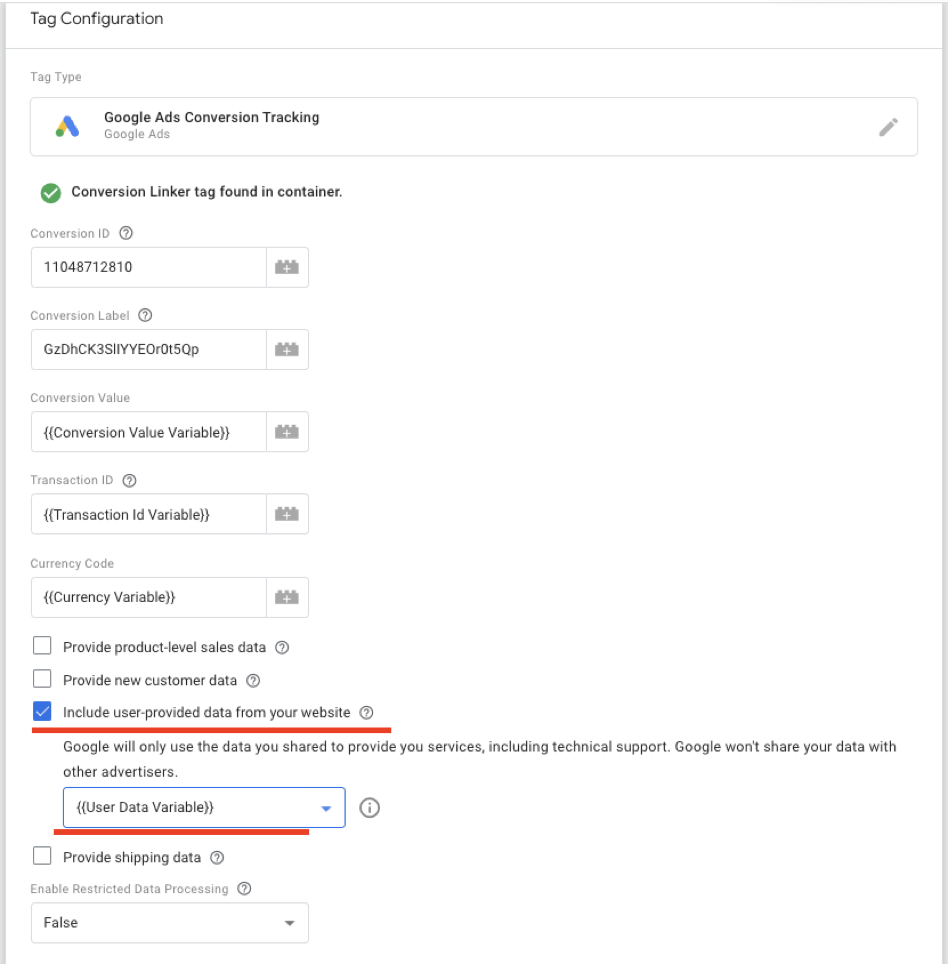
as a result we will see the following page.

Where Conversion ID and Conversion Label are static data that you got from Google Ads, in the previous steps.
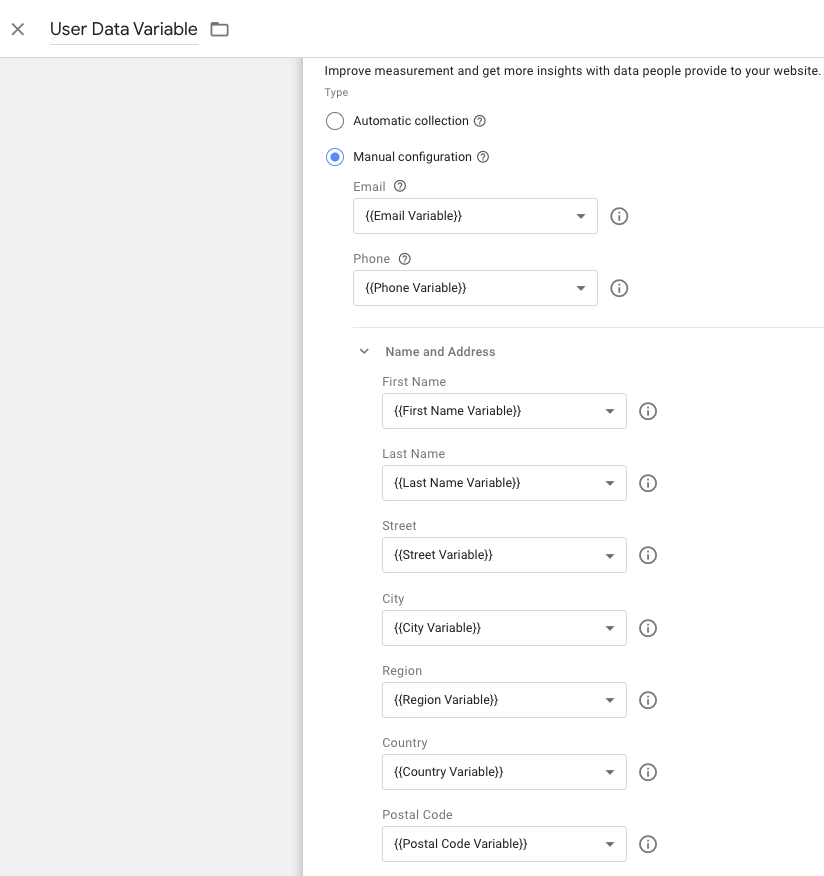
It is also very important to pre-select “Include user-provided data from your website” on the configuration screen.
Don’t forget to save and publish your changes.

Additional Optional Steps:
- There is also a possibility to manage custom tracking variables
- Conversion value, Transaction ID, and Currency Code are all dynamic values that we can get from dataLayer.
- For example in our case
- “{{Conversion Value Variable}}” → ecommerce.value,
- {{Transaction Id Variable}} → ecommerce.transaction_id,
- “{{Currency Variable}}” → ecommerce.currency.
- How to create Data Layer Variable in GTM and How to check the data structure.
Once you enable Enhanced Conversion, you’ll start getting a lot more information about your customer that will help you grow your business.
